ElasticSearch APM 설치 및 데이터 확인
2020, Oct 16
Elastic APM이란?
- 애플리케이션 모니터링을 위해 상세한 성능 지표를 제공 (문제 해결 시간을 최소화해주는 도구)
Elastic APM의 기능
- 앱과 서비스의 end to end 헬스 모니터링
- 이상치 탐지와 문제점 식별
- 문제점 분류 및 격리
- 근본 원인 분석 및 사고 연결
- 문제 디버깅 및 중화
최소한의 노력으로 애플리케이션 연결
- 총 7개의 언어와 프레임워크 제공 : 프론트엔드에서 백엔드까지 데이터 수집 가능
- 공개 표준 수용 : OpenTracing, Jaeger, OpenTelemetry…
- 코드 수준 가시성
- 에이전트 부하 최소화
애플리케이션과 서비스의 완전한 가시성 확보
- end to end 가시성 : 분산 트레이싱으로 마이크로서비스 환경에서의 병목지점 확인
- 의존성 매핑 자동 생성 : 의존성을 자동으로 그려줌
- 프로액티브 가용성 모니터링 : 업타임과 연동
스마트 탐지, 신속한 근본 원인 분석
- 자동 이상치 탐지
- 강력한 ad hoc 검색
- 단일화된 통합 가시성 : log와 메트릭컨텍스트 넘나드는 신속한 근본 원인 분석
기존 워크플로우와 통합
- 데브옵스 콜라보 : 배포 어노테이션의 상호 연결
- ITSM 프로세스 연결
Elasticsearch APM 설치
docker-compose.yml 파일 작성
version: '2.2'
services:
  apm-server:
    image: docker.elastic.co/apm/apm-server:7.9.2
    depends_on:
      elasticsearch:
        condition: service_healthy
      kibana:
        condition: service_healthy
    cap_add: ["CHOWN", "DAC_OVERRIDE", "SETGID", "SETUID"]
    cap_drop: ["ALL"]
    ports:
    - 8200:8200
    networks:
    - elastic
    command: >
       apm-server -e
         -E apm-server.rum.enabled=true
         -E setup.kibana.host=kibana:5601
         -E setup.template.settings.index.number_of_replicas=0
         -E apm-server.kibana.enabled=true
         -E apm-server.kibana.host=kibana:5601
         -E output.elasticsearch.hosts=["elasticsearch:9200"]
    healthcheck:
      interval: 10s
      retries: 12
      test: curl --write-out 'HTTP %{http_code}' --fail --silent --output /dev/null http://localhost:8200/

  elasticsearch:
    image: docker.elastic.co/elasticsearch/elasticsearch:7.9.2
    environment:
    - bootstrap.memory_lock=true
    - cluster.name=docker-cluster
    - cluster.routing.allocation.disk.threshold_enabled=false
    - discovery.type=single-node
    - ES_JAVA_OPTS=-XX:UseAVX=2 -Xms1g -Xmx1g
    ulimits:
      memlock:
        hard: -1
        soft: -1
    volumes:
    - esdata:/usr/share/elasticsearch/data
    ports:
    - 9200:9200
    networks:
    - elastic
    healthcheck:
      interval: 20s
      retries: 10
      test: curl -s http://localhost:9200/_cluster/health | grep -vq '"status":"red"'

  kibana:
    image: docker.elastic.co/kibana/kibana:7.9.2
    depends_on:
      elasticsearch:
        condition: service_healthy
    environment:
      ELASTICSEARCH_URL: http://elasticsearch:9200
      ELASTICSEARCH_HOSTS: http://elasticsearch:9200
    ports:
    - 5601:5601
    networks:
    - elastic
    healthcheck:
      interval: 10s
      retries: 20
      test: curl --write-out 'HTTP %{http_code}' --fail --silent --output /dev/null http://localhost:5601/api/status

volumes:
  esdata:
    driver: local

networks:
  elastic:
    driver: bridge


APM Agents 연결
1. elastic-apm-agent.jar 파일 download
https://search.maven.org/search?q=a:elastic-apm-agent
2. demo Springboot project 생성
- 필자는 아래와 같이 메이븐 프로젝트로 해당 Dependencies를 추가하여 프로젝트를 생성하였다.
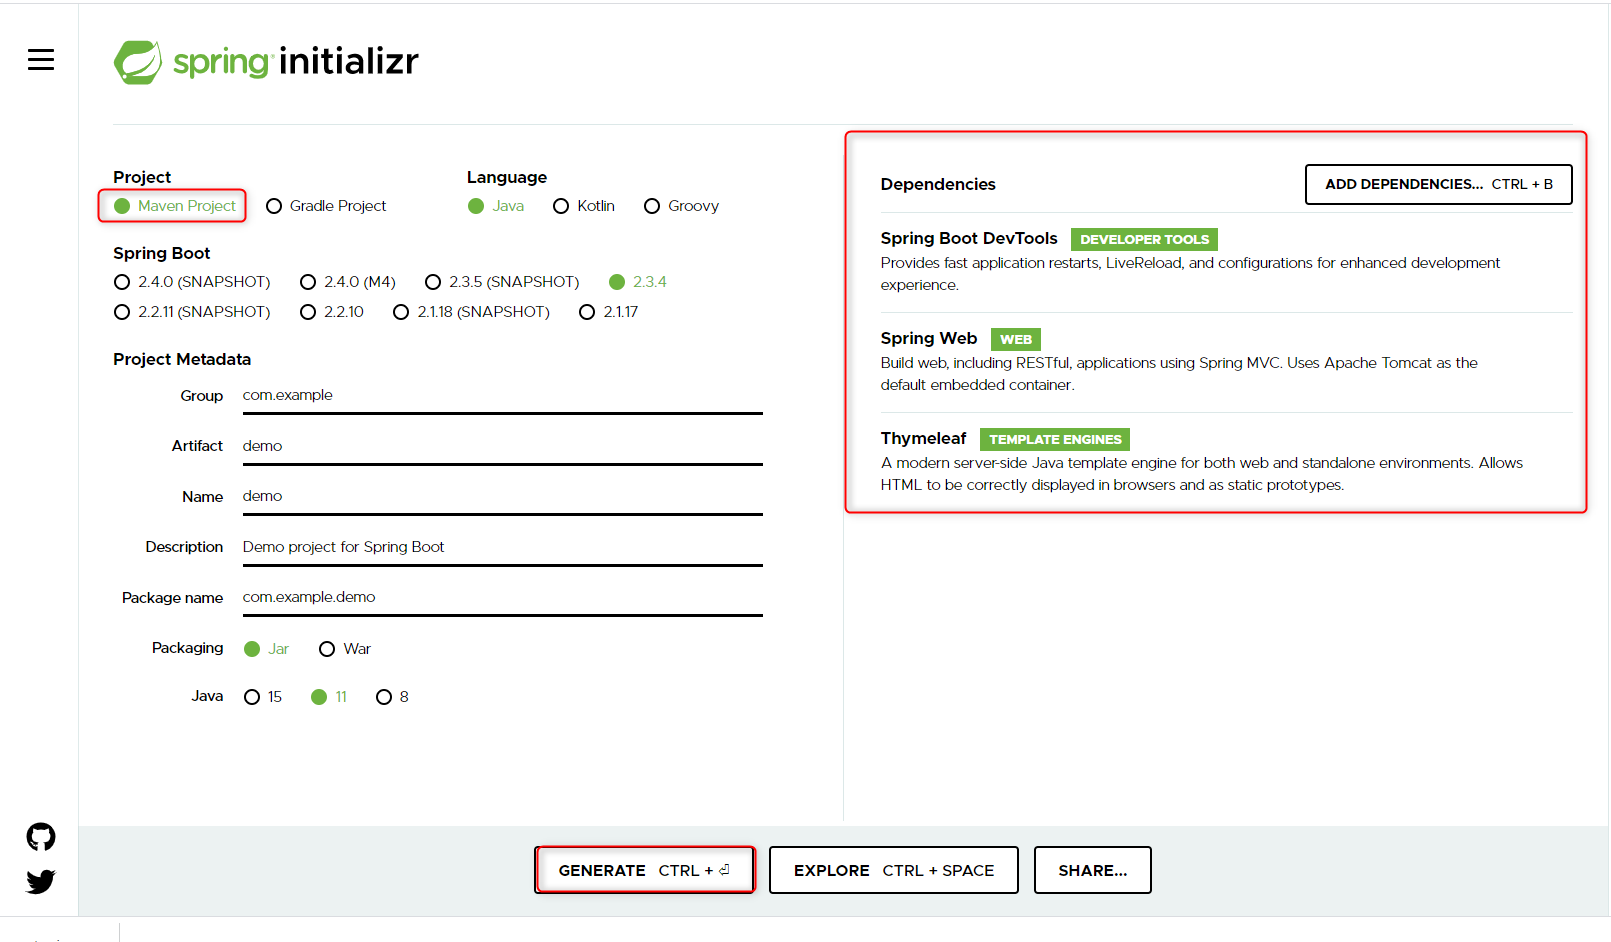
- 간단한 html 페이지를 띄우기 위해 아래와 같이
[DemoApplication.java](http://demoapplication.java)파일을 수정한다.
package com.example.demo;

import org.springframework.boot.SpringApplication;
import org.springframework.boot.autoconfigure.SpringBootApplication;
import org.springframework.web.bind.annotation.GetMapping;
import org.springframework.web.bind.annotation.RequestParam;
import org.springframework.web.bind.annotation.RestController;

@SpringBootApplication
@RestController
public class DemoApplication {

	public static void main(String[] args) {
		SpringApplication.run(DemoApplication.class, args);
		System.out.println("Hello World");
	}

	@GetMapping("/hello")
	public String sayHello(@RequestParam(value = "myName", defaultValue = "World") String name) {
		return String.format("Hello %s!", name);
	}
}
-
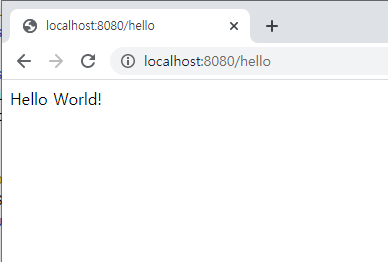
Application을 실행해 http://localhost:8080/hello 로 접속해서 Hello World!가 잘 찍혀나오는지 확인한다.
-
elastic-apm-agent.jar을 원하는 위치에 옮겨 놓고 인텔리제이에서
Ctrl+Alt+Shift+S로 창을 띄운 후Project Settings>Modules>Dependencies에+버튼을 눌러 다운받은 jar파일을 추가시키자.
java -javaagent:/path/to/elastic-apm-agent-<version>.jar \
     -Delastic.apm.service_name=my-application \
     -Delastic.apm.server_urls=http://localhost:8200 \
     -Delastic.apm.secret_token= \
     -Delastic.apm.application_packages=org.example \
     -jar my-application.jar
- 프로젝트를 jar파일로 묶어서 실행할 것이라면 위의 공식문서에 나와있는 대로 필요한 부분만 수정해서 사용하면 되고 IDE에서 그대로 실행하고 싶다면 필자처럼 VM options에 아래와 비슷하게 사용하여 실행하면 된다.
-javaagent:C:\/elastic-apm-agent-1.18.1.jar -Delastic.apm.service_name=demo -Delastic.apm.server_urls=http://172.23.13.91:8200 -Delastic.apm.secret_token= -Delastic.apm.application_packages=com.example.demo
-
오류가 나지 않고 정상적으로 실행 되었다면 키바나 APM 페이지로 돌아가
Check agent status와Load Kibana objects버튼을 눌러 성공적으로 세팅이 되었는지 확인한다.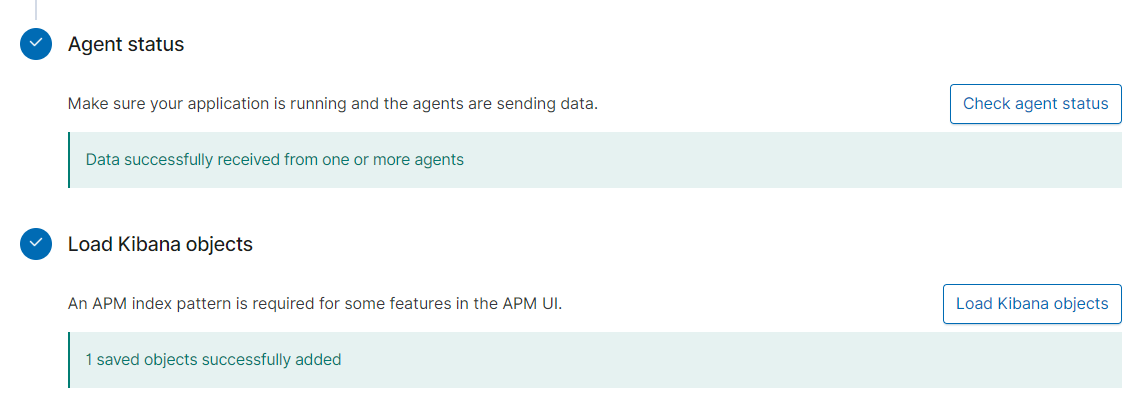
-
세팅이 잘 되었다면 APM을 실행한다.
APM 데이터 확인
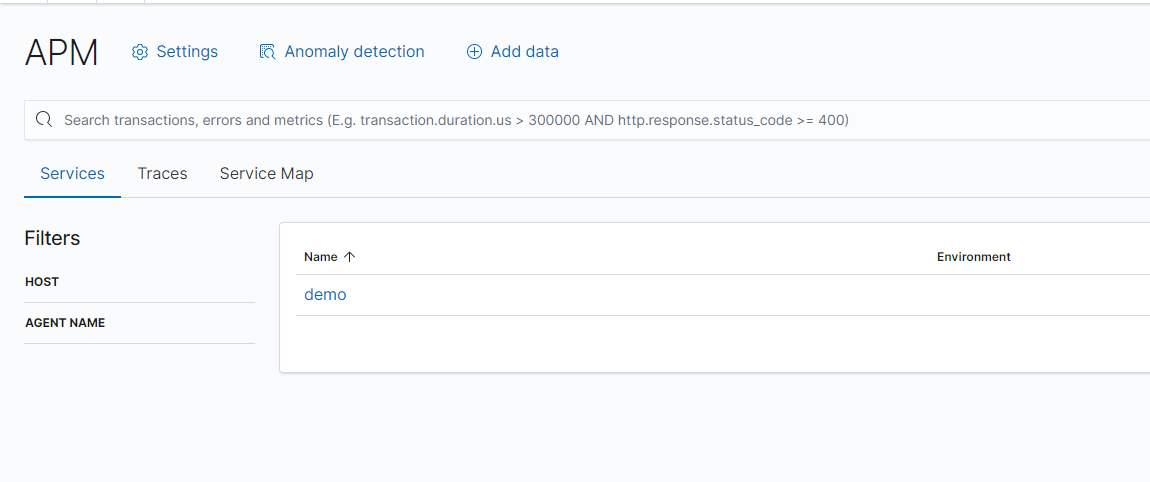
연동된 서비스 확인
- 필자가 연동한 서비스인 demo가 추가 되어있음을 확인할 수 있다.
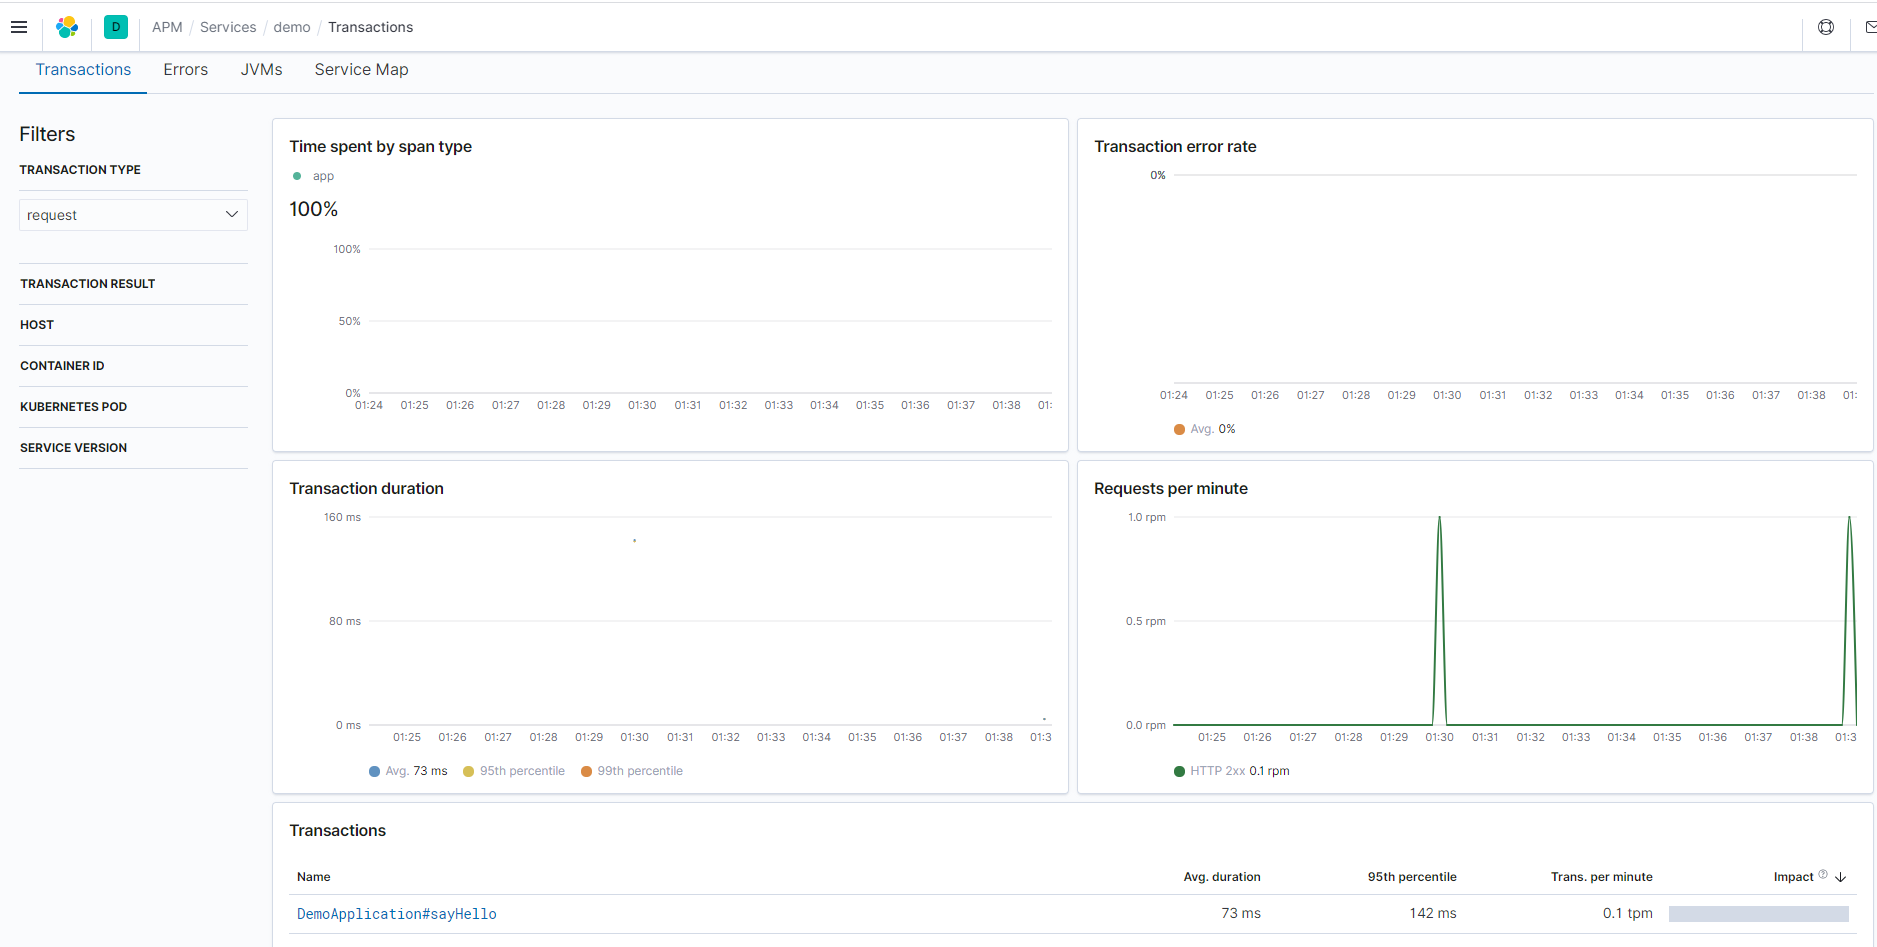
Transactions 모니터링
- 필터를 통해서 원하는 조건을 주어 트랜잭션에 대해서 모니터링이 가능
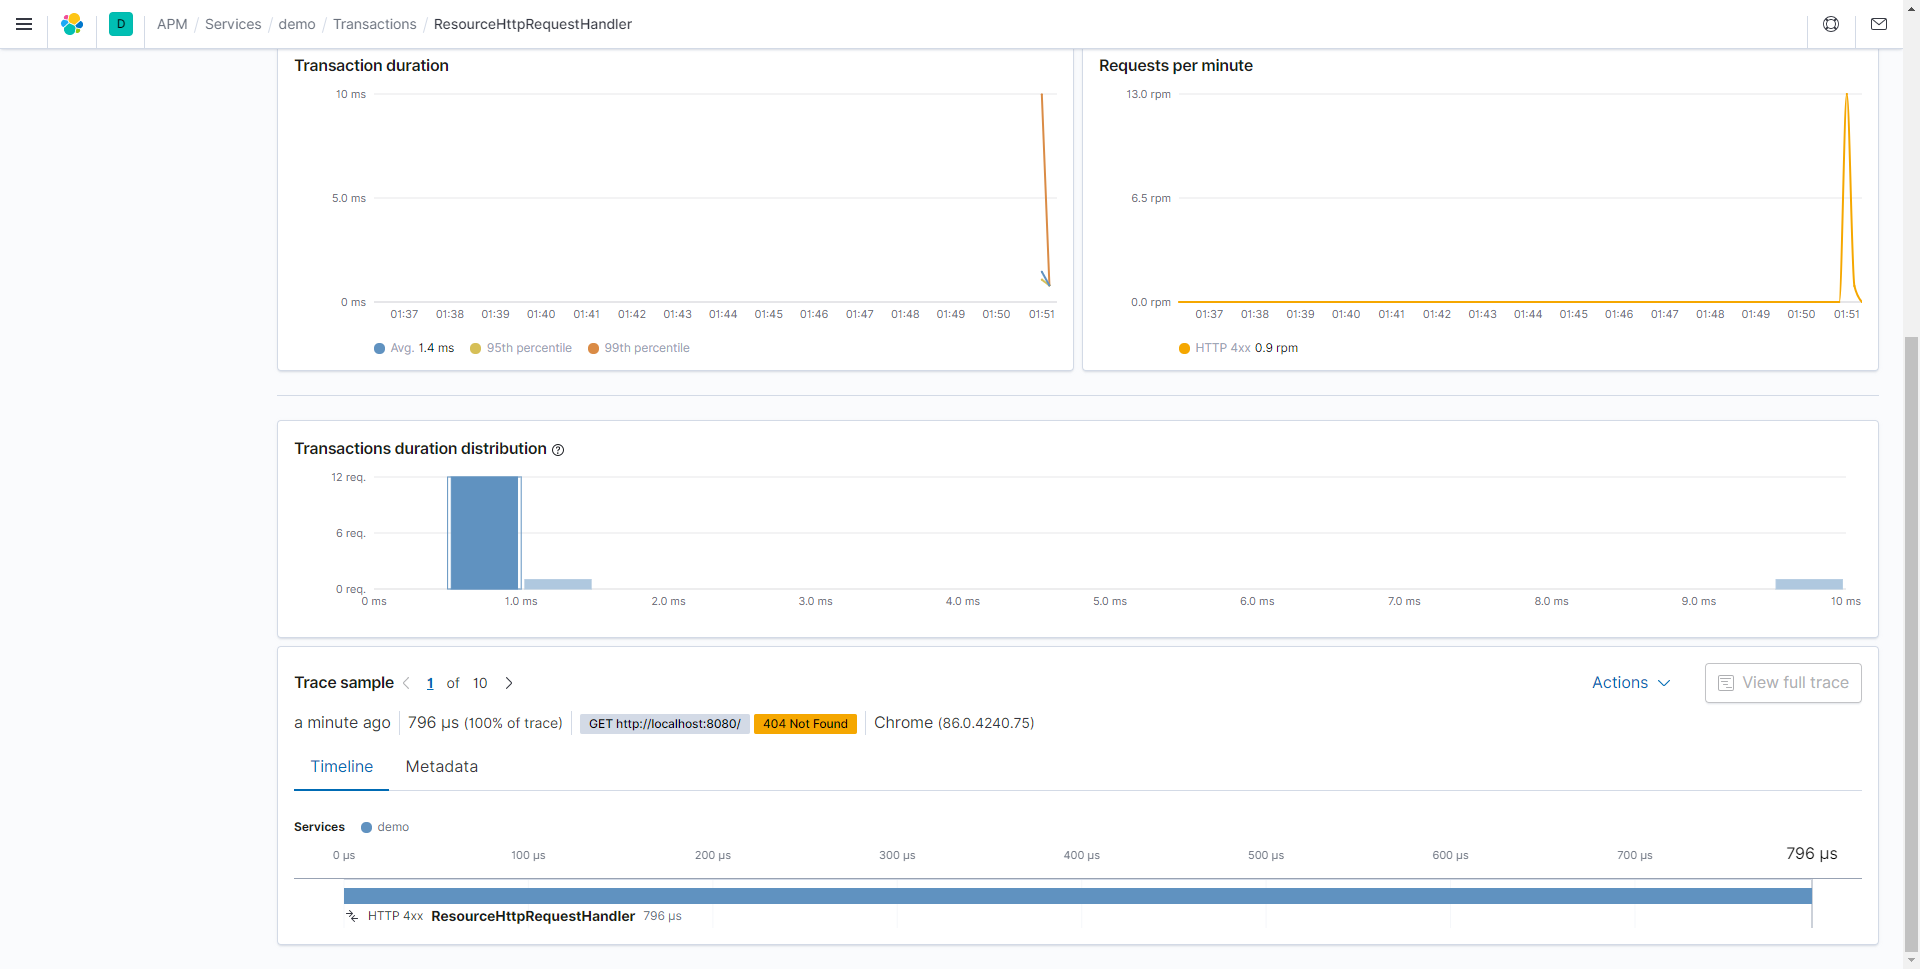
Errors 모니터링
- 필터를 통해서 원하는 조건을 주어 트랜잭션에 대해서 모니터링이 가능

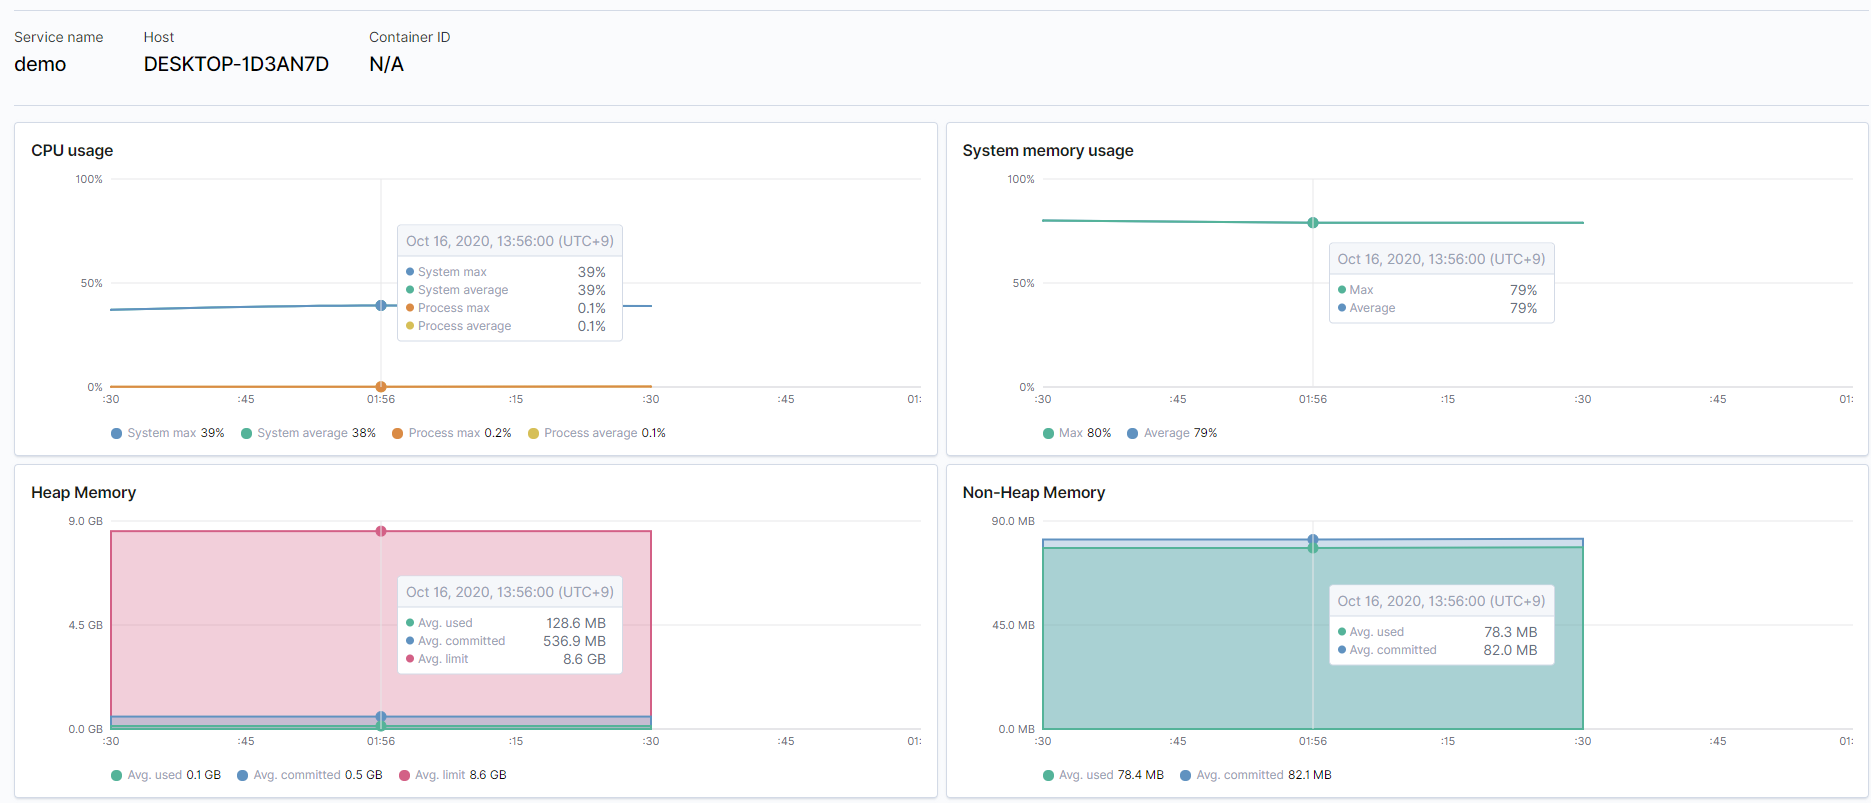
JVMs 모니터링
- 필터를 통해서 원하는 조건을 주어 트랜잭션에 대해서 모니터링이 가능
