SpringBoot REST API 서버 만들기 - (4) Server Side 렌더링 (thymeleaf)
오늘은 SpringBoot를 통한 서버 사이드 렌더링에 대해서 알아보도록 하겠다. SpringBoot에서는 JSP와 thymeleaf라는 템플릿 엔진을 기본으로 제공하지만 thymeleaf를 권장하기 때문에 이것을 사용하면서 서버 사이드 렌더링으로 페이지를 구현해보도록 하겠다. 따라오지 못한 사람이 있다면 필자의 소스를 클론해서 사용하기 바란다.
git clone [https://github.com/ahngo13/restapi-v1.git](https://github.com/ahngo13/restapi-v1.git)
Server Side Rendering이란?
- 어떠한 웹 페이지 접속시 서버에 새로운 페이지에 대한 요청을 하는 방식
thymeleaf html 페이지에 안녕 찍어보기
dependency 추가
필자의 블로그를 보면서 따라왔다면 기본적으로 pom.xml 파일에 아래와 같은 dependency가 추가 되어있을 것이다. 혹시 추가가 되어있지 않다면 추가를 하도록 하자.
<dependency>
    <groupId>org.springframework.boot</groupId>
    <artifactId>spring-boot-starter-thymeleaf</artifactId>
    <version>2.3.4.RELEASE</version>
</dependency>
@Controller 어노테이션으로 변경
기존 PostController에는 RestController 어노테이션이 추가되어 있었지만 이 어노테이션의 경우에는 RequestBody값을 기본적으로 가져오므로 템플릿을 인식하지 못한다. 따라서 Controller 어노테이션으로 변경해준다.
PostController.java
//Controller 어노테이션 추가 (controller 인식)
@Controller
// value : localhost:8080/posts로 접근할 경우 이 controller에 접근한다.
// produces : 생산 가능한 미디어 타입을 지정해서 일치할 때만 요청을 매칭함. (매핑 제한용)
// comsumes : 소비 가능한 미디어 타입을 지정해서 때만 요청을 매칭함. (매핑 제한용)
@RequestMapping(value = "/posts", produces = MediaType.APPLICATION_JSON_VALUE)
public class PostController {
index.html 이라는 파일로 렌더링 할 것이기 때문에 return “index”를 해주고 리턴 type은 String으로 변경해준다. model 객체를 전달받아 posts라는 attribute를 추가하여 해당 페이지에서 글 목록 리스트를 불러올 수 있도록 할 예정이다.
//글 목록 조회
@GetMapping(value = "")
public String getPostList(@RequestParam(value = "postId", required = false) Long postId, Model model){
    List<Post> posts= postRepository.findAll();
    model.addAttribute("posts", posts);
    return "index";
}
말이 index.html 페이지지만 /post 로 접속되기 때문에 언밀히 말하면 index는 아니다. 게시글 목록 조회하는 페이지가 첫 페이지라고 가정하고 작업해보도록 하겠다. 먼저 간단하게 thymeleaf가 인식이되는지 확인하기 위해 resources/templates 밑에 index.html 파일을 만들어 아래와 같이 작성하도록 하자.
index.html
<html xmlns:th="http://www.thymeleaf.org"> 를 선언하지 않으면 thymeleaf 문법이 인식되지 않으니 참고하기 바란다. (물론 현재는 타임이프 문법을 적용한 곳이 따로 없어서 의미는 없다)
<!DOCTYPE html>
<html xmlns:th="http://www.thymeleaf.org">
<head>
    <meta charset="UTF-8">
    <title>게시글 목록</title>
</head>
<body>
    <h1>안녕~</h1>
</body>
</html>

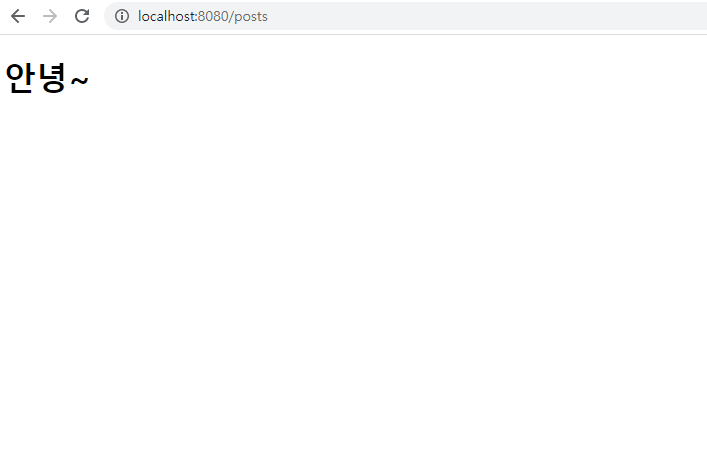
[localhost:8080/posts](http://localhost:8080/posts) 로 접속해보면 안녕~ 이라는 글자가 잘 출력됨을 확인할 수 있다.
게시판 CRUD 적용
그러면 게시판에 CRUD를 적용하여 thymeleaf 기반의 페이지들을 만들어 보도록 하겠다. 필자의 경우 CRUD를 각각 만들어서 하지 않고 한번에 만들어 놓은 뒤에 테스트 해보는 식으로 진행했다.
Backend
PostController.java
- 게시글 추가, 수정 페이지 이동
- state 값으로 변수를 받아 게시글 수정 요청인지 구분, postId 값으로 어떤 글을 수정해야 될지 판단
@GetMapping(value = "/add-post-page")
    public String getAddPostPage(@RequestParam(value = "state", required = false, defaultValue = "create")String state,
                                 @RequestParam(value = "postId", required = false) Long postId, Model model){
        if(state.equals("update")){
            Post post = postRepository.findById(postId).get();
            model.addAttribute("post", post);
        }

        model.addAttribute("state", state);
        model.addAttribute("postId", postId);

        return "add-post-page";
    }
frontend
frontend 단에는 index.html과 add-post-page.html 2개의 파일만 있어도 된다. 진짜 게시판의 경우에는 게시글에 대한 비밀번호로 삭제하거나 수정하겠지만 간단한 정도의 기능만 구현할 것이기 때문에 모든 글을 수정할 수 있고 삭제할 수 있도록 만들었다. html 태그에 th: 로 시작하는 부분은 thymeleaf 문법이니 참고하기 바란다. get 요청이 아닌 다른 요청을 할 때는 axios라는 것을 활용하여 로컬호스트 서버로 호출하였다.
- AXIOS CDN
<script src="https://unpkg.com/axios/dist/axios.min.js"></script>
- 소스 코드
index.html
<!DOCTYPE html>
<html xmlns:th="http://www.thymeleaf.org">
<head>
    <meta charset="UTF-8">
    <title>게시글 목록</title>
    <script src="https://unpkg.com/axios/dist/axios.min.js"></script>
</head>
<body>
    <h1>게시글 목록</h1>
    <table border="1">
        <tr>
            <td>게시글 번호</td>
            <td>게시글 제목</td>
        </tr>
        <!--글 목록을 불러오는 부분-->
        <tr th:each="post : ${posts}">
            <td th:text="${post.postId}" th:onclick="|javascript:modifyPostPage('${post.postId}')|"></td>
            <td th:text="${post.title}" th:onclick="|javascript:modifyPostPage(${post.postId})|"></td>
        </tr>
    </table>
    <button id="addPostPageBtn" onclick="addPostPage()">게시글 작성</button>
    <script>
        //게시글 쓰기 페이지로 이동
        const addPostPage = () => {
            location.href = "/posts/add-post-page";
        }
        //게시글 수정 페이지로 이동
        const modifyPostPage = (postId) => {
            location.href = "/posts/add-post-page?state=update&postId="+postId;
        }
    </script>
</body>
</html>
add-post-page.html
<!DOCTYPE html>
<html xmlns:th="http://www.thymeleaf.org">
<head>
    <meta charset="UTF-8">
    <title>게시글 추가/수정</title>
    <script src="https://unpkg.com/axios/dist/axios.min.js"></script>
</head>
<body>
    <div th:if="${state == 'create'}">
        <h1>게시글 추가</h1>
        <div>
            게시글 제목 : <input id="createTitle" placeholder="게시글 제목을 입력해주세요." type="text"><br/>
            게시글 내용 : <textarea id="createContents" placeholder="게시글 내용을 입력해주세요."></textarea><br/>
            <button onclick="createPost()">저장</button>
        </div>
    </div>
    <div th:unless="${state == 'create'}">
        <h1>게시글 수정</h1>
        <div>
            게시글 제목 : <input id="modifyTitle" th:value="${post.title}" placeholder="게시글 제목을 입력해주세요." type="text"><br/>
            게시글 내용 : <textarea id="modifyContents" rows="20" cols="80" th:text="${post.contents}" placeholder="게시글 내용을 입력해주세요."></textarea><br/>
            <button onclick="modifyPost()">수정</button>
            <button onclick="deletePost()">삭제</button>
            <input type="hidden" id="postId" th:value="${postId}">
        </div>
    </div>
    <script>
        //게시글 쓰기
        const createPost=()=>{
            const title = document.querySelector('#createTitle').value;
            const contents = document.querySelector('#createContents').value;
            const send_param = {
                title,
                contents
            }
             axios.post('http://localhost:8080/posts', send_param)
                .then(function(response) {
                  console.log(response);
                  alert("저장 되었습니다!");
                  location.href = "/posts";
                })
                .catch(function(error) {
                  console.log(error);
                });
        }
        //게시글 수정
        const modifyPost=()=>{
            const title = document.querySelector('#modifyTitle').value;
            const contents = document.querySelector('#modifyContents').value;
            const postId = document.querySelector('#postId').value;
            const send_param = {
                title,
                contents
            }
             axios.put('http://localhost:8080/posts/' + postId, send_param)
                .then(function(response) {
                  console.log(response);
                  alert("수정 되었습니다!");
                  location.href = "/posts";
                })
                .catch(function(error) {
                  console.log(error);
                });
        }
        //게시글 삭제
        const deletePost=()=>{
            const postId = document.querySelector('#postId').value;
            const send_param = {
                postId
            }
             axios.delete('http://localhost:8080/posts/' + postId, send_param)
                .then(function(response) {
                  console.log(response);
                  alert("삭제 되었습니다!");
                  location.href = "/posts";
                })
                .catch(function(error) {
                  console.log(error);
                });
        }
    </script>
</body>
</html>
테스트
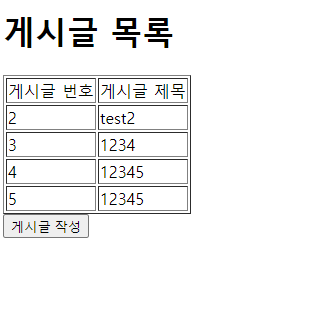
게시글 목록 조회
게시글 추가
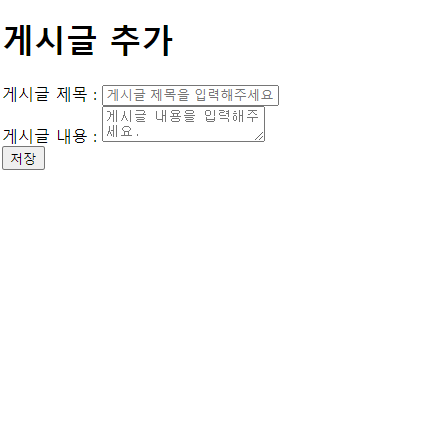
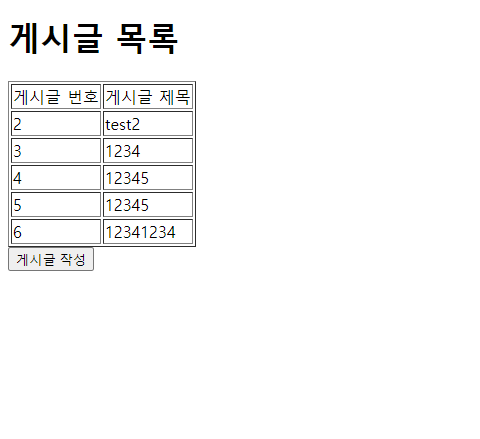
게시글 제목을 12341234, 글내용을 12341234 입력하고 저장하니 아래와 같이 글이 추가됨을 확인할 수 있다.
글 수정
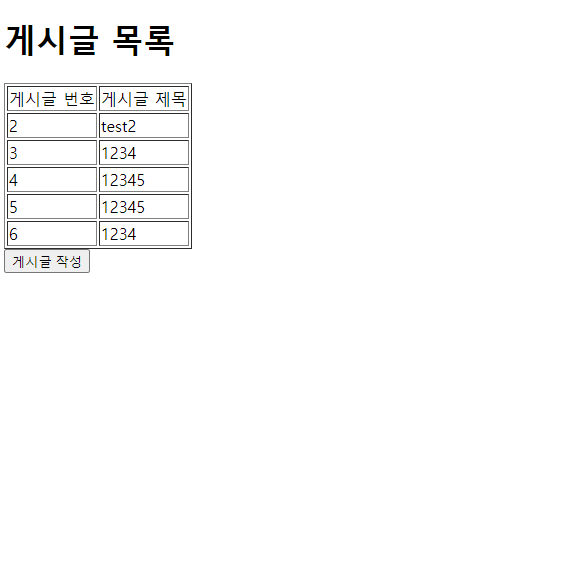
방금 작성했던 글의 제목을 1234로 수정해보자.
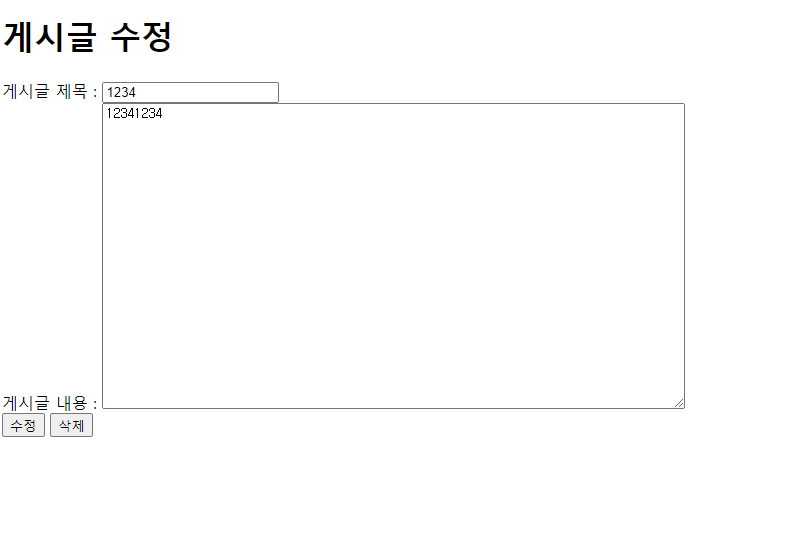
아래와 같이 게시글 목록에서 6번 글의 제목이 1234로 변경된 것을 확인할 수 있다.
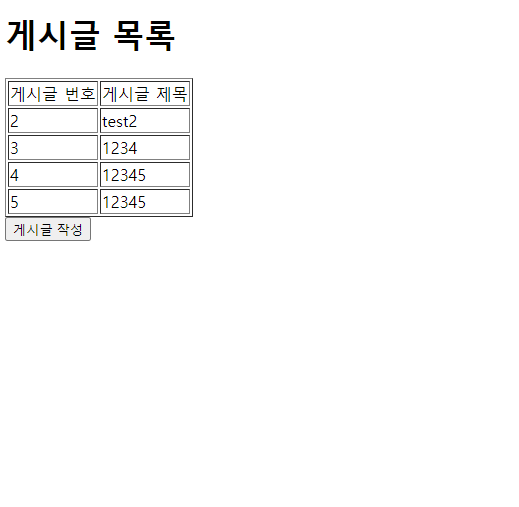
게시글 삭제
마지막으로 게시글 삭제이다. 게시글 목록에서 6번 글을 눌러 삭제버튼을 눌러주자. 그러면 아래와 같이 게시글 목록에서 6번 글이 삭제됨을 확인할 수 있다.
자 이렇게 오늘은 thymeleaf 템플릿 엔진을 사용하여 서버 사이드 렌더링을 적용해보았다. 잘 따라오지 못했다면 완성본 소스를 github에서 참고해서 진행하기 바란다.
https://github.com/ahngo13/restapi-v2
참고 사이트
https://junsday.tistory.com/44